Easy Homemade Dumplings Recipe: Soft, Juicy & Pan-Fried to Perfection
This dumplings recipe keeps things simple while still giving you the texture most people want from homemade dumplings. The wrappers turn soft and chewy, the filling stays juicy, and the bottoms get crisp and golden in the pan. You do not need special equipment or advanced folding skills to make them work. The method is straightforward once you go through one batch. If you enjoy cooking from scratch or want freezer friendly meals that actually reheat well, these dumplings are worth learning. T
A recipe from
Maria Arnold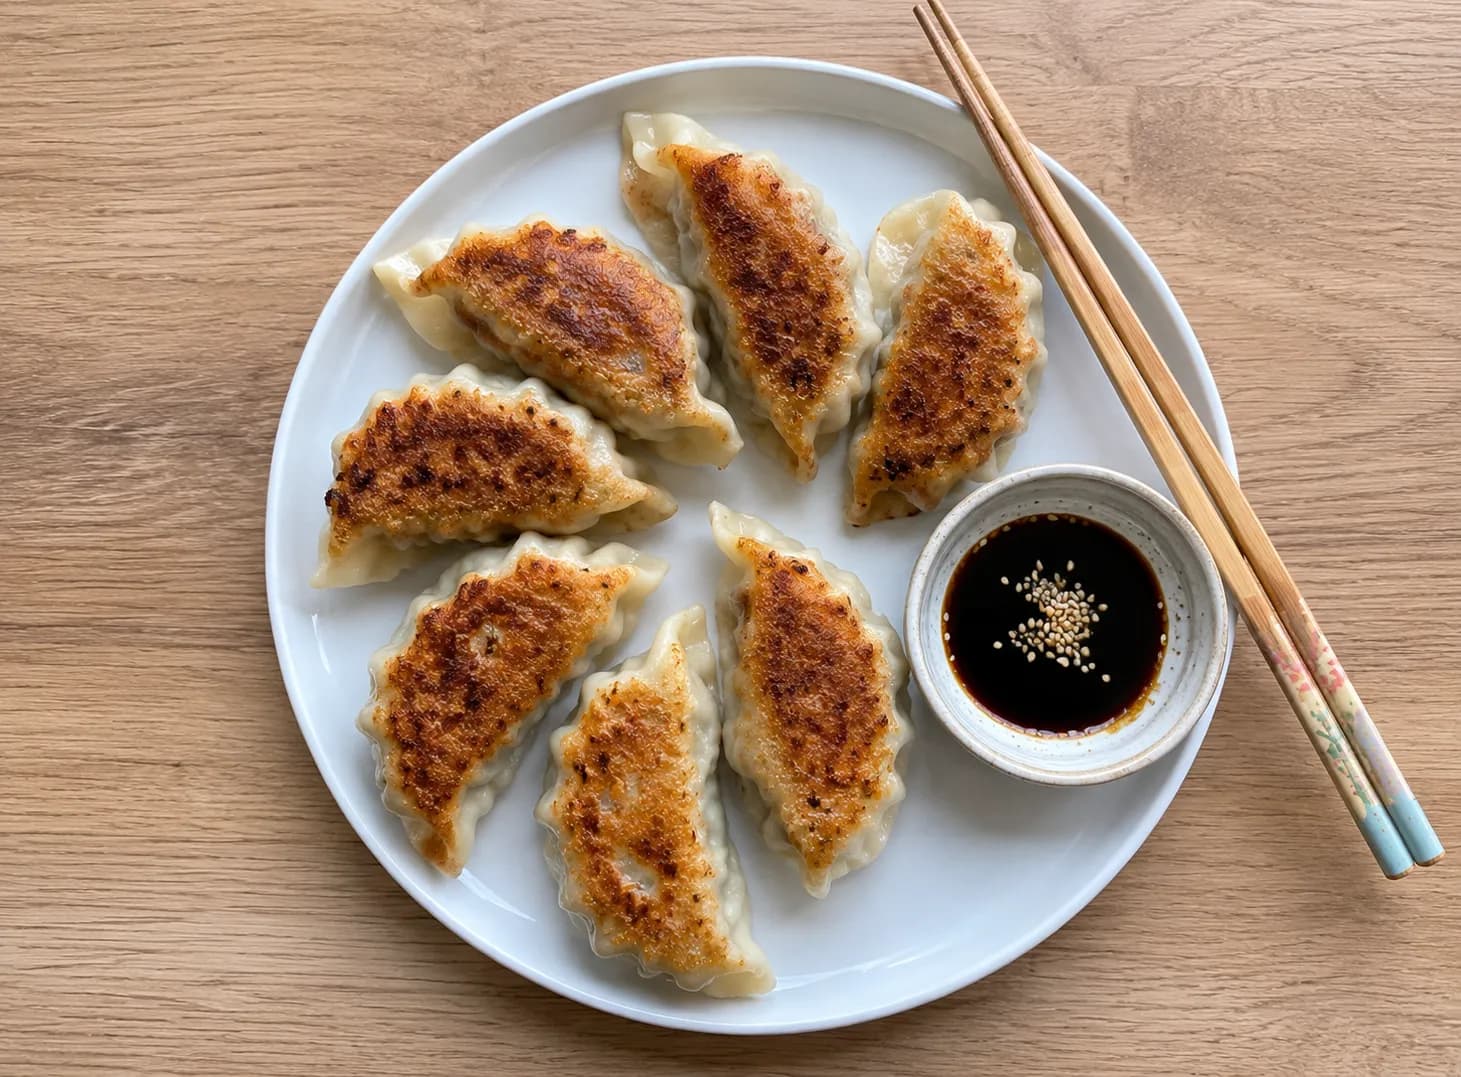
Ingredients
Yields 4 servings
- 2 cups all purpose flour
- 0.8 cup boiling water
- 0.3 cup cold water
- 1/2 teaspoon salt
- 1/2 pound ground pork or chicken
- 1 cup napa cabbage (finely chopped)
- 3 green onions (sliced thin)
- 1 teaspoon fresh ginger (grated)
- 2 garlic cloves (minced)
- 2 tablespoons soy sauce
- 1 tablespoon sesame oil
- 1 tablespoon rice wine or dry sherry
- 1/2 teaspoon salt
- 1/3 teaspoon white pepper
- 2 tablespoons neutral oil
- 1/3 cup water for steaming
- 3 tablespoons soy sauce
- 1 tablespoon rice vinegar
- 1 teaspoon chili oil or sesame oil
Method
61 steps
- 1
Step 1: Make the Dough
- 2
Add the flour and salt to a large mixing bowl.
- 3
Slowly pour in the boiling water while stirring with a fork or chopsticks. The hot water helps soften the dough and makes the wrappers easier to roll later.
- 4
Add the cold water and continue mixing until the dough starts coming together in rough clumps.
- 5
Transfer the dough onto a clean work surface.
- 6
Knead for about 8 to 10 minutes until smooth. The dough should feel soft with a little resistance when pressed. If it feels sticky, dust lightly with flour. If it feels dry or stiff, wet your hands slightly and continue kneading.
- 7
Cover the dough with a damp towel or plastic wrap and let it rest for 30 minutes.
- 8
Do not skip the resting time. It makes rolling the wrappers much easier and keeps them from shrinking back while you work.
- 9
Step 2: Remove Moisture From the Cabbage
- 10
Place the chopped napa cabbage into a bowl.
- 11
Sprinkle a pinch of salt over it and toss lightly.
- 12
Let it sit for about 10 minutes. The cabbage will release a surprising amount of water during this time.
- 13
Grab small handfuls and squeeze firmly over the sink until most of the liquid is gone.
- 14
This step matters more than it seems. Watery cabbage turns the filling loose and can cause wrappers to tear while folding or cooking.
- 15
Set the cabbage aside once squeezed dry.
- 16
Step 3: Make the Filling
- 17
In a mixing bowl, combine the ground pork or chicken with the cabbage, green onions, ginger, garlic, soy sauce, sesame oil, rice wine, salt, and white pepper.
- 18
Mix everything together in one direction for about 1 to 2 minutes.
- 19
The filling should become slightly sticky and hold together when stirred. That texture helps keep the inside juicy instead of crumbly after cooking.
- 20
Cover and refrigerate while you prepare the wrappers.
- 21
Cold filling is easier to handle and helps the dumplings keep their shape during folding.
- 22
Step 4: Divide the Dough
- 23
Cut the rested dough into 4 equal pieces.
- 24
Roll each piece into a thick rope.
- 25
Slice each rope into 8 to 10 smaller portions.
- 26
Flatten each piece lightly with your palm.
- 27
Keep the unused dough covered while you work so it does not dry out.
- 28
Step 5: Roll the Wrappers
- 29
Using a rolling pin, roll each dough piece into a circle about 3 to 3.5 inches wide.
- 30
Roll from the outer edge toward the center while rotating the dough as you go.
- 31
Try to keep the center slightly thicker than the edges. Thin edges fold better, while a slightly thicker middle supports the filling.
- 32
If the wrappers start sticking, use a light dusting of flour.
- 33
Stack finished wrappers under a towel while you continue.
- 34
Step 6: Fill and Seal
- 35
Place about 1 heaping teaspoon of filling in the center of each wrapper.
- 36
Fold the wrapper over the filling to create a half moon shape.
- 37
Pinch the edges together firmly.
- 38
You can leave the edge plain or pleat one side while sealing. Pleating is mostly for appearance, but it can help keep wetter fillings sealed tightly.
- 39
Do not overfill the dumplings. Too much filling makes sealing difficult and increases the chance of tearing.
- 40
Place finished dumplings on a lightly floured tray.
- 41
Keep them covered while you finish the batch.
- 42
Step 7: Pan Fry the Dumplings
- 43
Heat neutral oil in a non stick skillet over medium high heat.
- 44
Arrange the dumplings flat side down in the pan.
- 45
Leave a little space between each one.
- 46
Cook undisturbed for 2 to 3 minutes.
- 47
The bottoms should turn deep golden brown before moving to the next step. Light browning will not give the same crisp texture.
- 48
Avoid moving the dumplings too early. Once the crust forms, they release from the pan more easily.
- 49
Step 8: Steam the Dumplings
- 50
Carefully pour the water into the pan.
- 51
Immediately cover with a lid because the oil will splatter.
- 52
Reduce the heat to medium.
- 53
Steam for 6 to 8 minutes until the water fully evaporates.
- 54
Listen closely. Once the bubbling sound mostly disappears, remove the lid.
- 55
Cook for 1 more minute to crisp the bottoms again.
- 56
The wrappers should look slightly translucent and tender while the bottoms stay crisp.
- 57
Step 9: Make the Dipping Sauce
- 58
Combine soy sauce, rice vinegar, and chili oil in a small bowl.
- 59
Taste and adjust if needed.
- 60
Some people like more vinegar for acidity while others prefer extra chili oil for heat.
- 61
Serve the dumplings hot with the dipping sauce on the side.
From the family
0 notes on this recipe.
No comments yet — be the first to say how it turned out.
Log in to leave a comment.